Author: Sharad Doshi

  • How to Cancel a Transaction From My Bank Account? Easy Guide!

    How to Cancel a Transaction From My Bank Account? Easy Guide!

    How to Cancel a Transaction From My Bank Account? In today’s fast-paced digital world, financial transactions are completed in seconds. While this efficiency has brought numerous conveniences, it also comes with a downside: the occasional need to cancel a transaction. Whether it’s a mistake, a change of mind, or a fraudulent activity, understanding how to effectively cancel a bank transaction can save you time, money, and stress. This guide delves into the various scenarios and steps you can take to address this issue, ensuring you’re well-equipped to handle such situations.

    How to Cancel a Transaction From My Bank Account?

    The Basics of Transaction Cancellations

    Before diving into the specifics, it’s essential to understand that the ability to cancel a bank transaction depends on two key factors:

    1. The Type of Transaction: Transactions can vary from debit card purchases and credit card payments to bank transfers. Each type has distinct rules and processes for cancellations.
    2. The Timing of the Transaction: Transactions are typically categorized into two stages: pending (authorized but not yet processed) and posted (already processed). The stage at which your transaction stands will determine your options.

    Let’s explore the different scenarios and what you can do in each case.

    Pending Transactions (Authorized but Not Yet Processed)

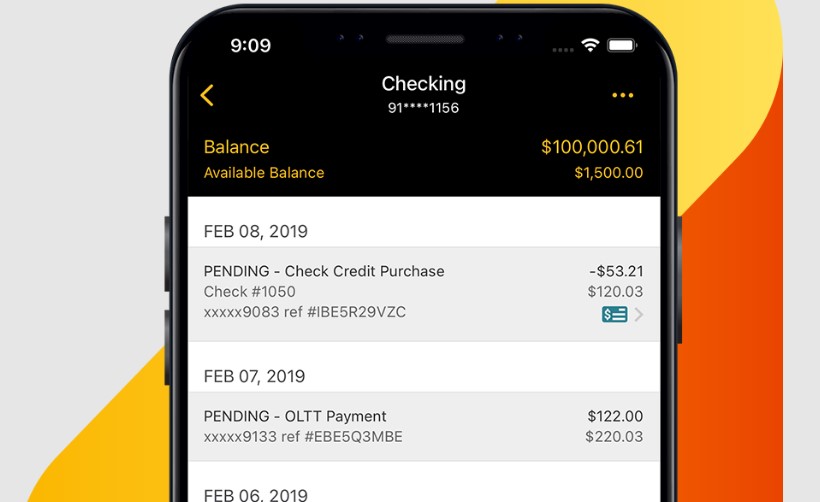
    Pending transactions are those that have been authorized by your bank but have not yet been fully processed or settled. These transactions appear on your account as “pending” and are usually the easiest to cancel. Here’s what you can do:

    1. Contact the Merchant

    The most direct and effective way to cancel a pending transaction is to contact the merchant involved. Here’s how:

    • Explain the Situation: Inform the merchant about the reason for cancellation, whether it’s due to a mistake, change of mind, or another issue.
    • Request Cancellation: Ask the merchant to cancel the authorization directly. Merchants often have the ability to void a transaction before it is processed fully.
    • Get Confirmation: Ensure you receive written or email confirmation from the merchant to verify that the cancellation has been completed.

    2. Seek Assistance from Your Bank

    If contacting the merchant is unsuccessful or not feasible, you can turn to your bank for help. Banks have protocols to handle pending transactions. Here’s what you should do:

    • Provide Transaction Details: Be ready to share the transaction date, amount, merchant name, and any reference numbers.
    • Explain the Urgency: Highlight that the transaction is still pending and emphasize the need for immediate action.
    • Follow Up: Request updates from the bank to ensure that the authorization has been canceled successfully.

    Posted Transactions (Already Processed)

    Posted transactions are those that have already been processed and settled in your account. Canceling these transactions is more complex but not impossible. Here are your options:

    1. Dispute the Charge

    If you believe the transaction is fraudulent or was made in error, you can file a dispute with your bank. This process, commonly referred to as a “chargeback,” involves the following steps:

    • Contact Your Bank Immediately: Most banks have specific timeframes for filing disputes, so acting quickly is crucial.
    • Provide Supporting Evidence: Gather receipts, emails, or any documentation that supports your claim.
    • Follow the Bank’s Process: Banks typically have a dispute resolution team that will investigate the issue and work to reverse the charge if your claim is valid.

    2. Contact the Merchant for a Refund

    If the transaction is legitimate but you wish to cancel it due to dissatisfaction with goods or services, reach out to the merchant directly. Here’s what you can do:

    • Request a Refund: Explain your reason for seeking a refund, whether it’s due to a defective product, poor service, or a change of mind.
    • Provide Proof of Purchase: Show your receipt or any other documentation that confirms the transaction.
    • Follow Up: Merchants may take time to process refunds, so maintain regular communication to track progress.

    Important Considerations for Cancelling Transactions

    Canceling a bank transaction is not always straightforward. Here are some critical factors to keep in mind:

    1. Transaction Type

    The cancellation process may vary based on the type of transaction:

    • Debit Card Transactions: These often have a short window for cancellation while they’re pending.
    • Credit Card Transactions: Credit cards offer more robust protection, including the ability to file chargebacks for disputes.
    • Bank Transfers: Cancelling a bank transfer can be challenging, especially for international or same-day transfers.

    2. Bank Policies

    Each bank has unique policies regarding transaction cancellations. It’s essential to:

    • Review your bank’s terms and conditions.
    • Contact your bank’s customer service for specific guidance.

    3. Timeliness

    Acting promptly is critical when canceling transactions. The sooner you take action, the higher your chances of success.

    Information You’ll Need to Cancel a Transaction

    To expedite the cancellation process, gather the following information:

    1. Transaction Details:
      • Date of the transaction.
      • Amount charged.
      • Merchant name.
      • Reference or authorization numbers.
    2. Your Bank Account Information:
      • Account number.
      • Contact details associated with your account.
    3. Supporting Documents:
      • Receipts, invoices, or emails related to the transaction.

    Mistakes and unexpected situations happen, but knowing how to cancel a bank transaction can make all the difference. Whether you’re dealing with a pending or posted transaction, acting quickly and understanding your options are key. Always maintain detailed records of your transactions and be proactive in resolving any issues. With these strategies, you can navigate the complexities of transaction cancellations with confidence and ease.

  • How to Cancel a Walmart Pickup Order? Easy Guide!

    How to Cancel a Walmart Pickup Order? Easy Guide!

    How to Cancel a Walmart Pickup Order? Canceling a Walmart pickup order can be a straightforward process, but understanding the steps and key considerations can save you time and hassle. Whether you’ve changed your mind about the items, found a better deal elsewhere, or simply need to delay your purchase, knowing how to manage your Walmart pickup orders effectively ensures a smooth shopping experience.

    How to Cancel a Walmart Pickup Order?

    This article will guide you through everything you need to know about canceling a Walmart pickup order—from logging into your account to receiving confirmation of your cancellation. Along the way, we’ll also address potential challenges you may encounter and share tips to make your cancellation process as seamless as possible.

    How to Cancel a Walmart Pickup Order?

    Canceling your Walmart pickup order can be done through the Walmart website or app. Follow these step-by-step instructions to ensure your cancellation is successful:

    1. Log in to Your Walmart Account

    The first step to canceling your order is logging into your Walmart account:

    • Visit the Website or Open the App: Go to Walmart.com on your web browser or open the Walmart app on your mobile device.
    • Sign In: Use the same email address and password you used when placing the order. Ensure that your credentials are accurate to access your order details quickly.

    2. Find Your Pickup Order

    Once logged in, navigate to your order history:

    • Go to “Order History” or “Purchase History”: This section contains all the orders you’ve placed through Walmart.
    • Locate the Specific Order: Look for the particular pickup order you want to cancel. Check the order details to confirm it’s the correct one before proceeding.

    3. Cancel the Order

    After identifying the correct order, follow these steps:

    • Select the Order: Click on the order to open its details page.
    • Click “Cancel Order” or “Request Cancellation”: Look for a button or link with these labels. The exact wording may vary depending on the platform or version of the app.

    4. Confirm Cancellation

    You’ll need to confirm your intent to cancel:

    • Choose a Reason for Cancellation: A drop-down menu may appear, asking you to select a reason for canceling your order. Options might include “Changed My Mind,” “Found a Better Price,” or “Ordered by Mistake.”
    • Confirm Your Cancellation: Once you’ve selected a reason, click “Confirm Cancellation” to finalize the process.

    5. Receive Confirmation

    After confirming your cancellation:

    • Check Your Email: Walmart will send a confirmation email verifying that your order has been canceled.
    • Review Your Refund Status: If you’ve already paid for the order, Walmart will issue a refund to your original payment method. Refund processing times may vary based on your bank or payment provider.

    Important Notes About Canceling Walmart Pickup Orders

    While the cancellation process is generally simple, there are a few important points to keep in mind:

    1. Timing Matters

    • Orders Already Prepared for Pickup: If your order has been prepared for pickup or is in the process of being fulfilled, you may not be able to cancel it online.
    • Act Quickly: To maximize your chances of successfully canceling an order, initiate the cancellation as soon as possible after placing it.

    2. Customer Service Assistance

    • Contact Walmart Support: If you’re unable to cancel your order through the website or app, reach out to Walmart’s customer service team for help. They can be reached via phone, email, or chat support.

    3. Refund Policies

    • Refunds for Paid Orders: Walmart typically processes refunds to the original payment method used for the order. Depending on your payment provider, it may take several days for the refund to appear in your account.
    • Partial Cancellations: If you’re canceling only part of an order, make sure to verify how refunds will be handled for the remaining items.

    4. Alternatives to Cancellation

    If canceling your order isn’t possible due to timing or other restrictions, consider the following:

    • Modify Your Order: Depending on the order’s status, you may be able to update item quantities or change the pickup location.
    • Reschedule Pickup: If you’re unable to collect your order on the scheduled date, Walmart may allow you to reschedule your pickup time.
    • Return After Pickup: If cancellation isn’t feasible, you can pick up the order and initiate a return for unwanted items.

    Troubleshooting Common Issues

    Here are some solutions to common problems you may encounter when attempting to cancel a Walmart pickup order:

    1. Unable to Locate the Order

    • Double-Check Your Account: Ensure you’re logged into the correct Walmart account associated with the order.
    • Search by Order Number: Use the order number from your confirmation email to locate the order in your history.

    2. Cancellation Button Not Visible

    • Order Status: Verify the status of your order. If it’s already prepared or out for pickup, the cancellation option may be unavailable.
    • Contact Support: Reach out to Walmart customer service for assistance if you’re unable to find the cancellation option.

    3. Refund Delays

    • Payment Method Issues: Refund times can vary based on your payment provider. Check with your bank or card issuer if the refund takes longer than expected.
    • Confirmation Email: Ensure you’ve received a cancellation confirmation email, which serves as proof of your request.

    Canceling a Walmart pickup order is a simple process when you know the steps and key considerations. By acting quickly and using the tools available through the Walmart website or app, you can manage your orders with ease. Remember to keep track of your order details and follow up with customer service if needed.

    Whether you’re adjusting your shopping plans or encountering an unexpected issue, Walmart’s cancellation process is designed to offer flexibility and convenience. Use the tips and guidelines in this article to ensure a hassle-free experience, and don’t hesitate to reach out for support if you need additional assistance.

  • How to Cancel a Room On Booking.com? Easy Guide!

    How to Cancel a Room On Booking.com? Easy Guide!

    How to Cancel a Room On Booking.com? Booking.com is a widely popular platform that connects travelers with accommodations around the globe. Whether you’re planning a weekend getaway or managing a property listing, this platform offers a seamless experience for both guests and hosts. However, sometimes plans change, and cancellations become inevitable. Knowing how to cancel a reservation efficiently and understanding the policies involved can save you time and prevent unnecessary stress.

    How to Cancel a Room On Booking.com?

    In this comprehensive guide, we will walk you through the steps for canceling a Booking.com reservation—whether you’re a guest or a property host. We will also discuss important considerations, including cancellation policies, penalties, and tips for avoiding unnecessary fees. Let’s delve into the specifics to make this process as smooth as possible.

    Canceling a Booking.com Reservation as a Guest

    If you’ve booked an accommodation through Booking.com as a guest and need to cancel your reservation, follow these steps:

    1. Log in to Your Booking.com Account Begin by accessing your Booking.com account through the website or mobile app. If you made the booking as a guest without creating an account, locate your booking confirmation email, which contains a link to manage your reservation.
    2. Go to the “Bookings” Section Once logged in, navigate to the “Bookings” or “My Bookings” section. Here, you will see a list of all your active and past reservations.
    3. Select the Reservation You Want to Cancel Identify the specific booking you wish to cancel. Click on it to view the reservation details.
    4. Click on “Cancel Reservation” or “Request to Cancel Reservation” Look for the option to cancel your reservation. This may be labeled as “Cancel Reservation” or “Request to Cancel Reservation.” Click on the button to initiate the cancellation process.
    5. Select a Reason for Cancellation Booking.com may prompt you to provide a reason for your cancellation. Common reasons include changes in travel plans, unforeseen circumstances, or errors in the booking.
    6. Confirm the Cancellation After selecting a reason, click on the “Cancel” button to finalize the process. You should receive an email confirming the cancellation shortly after.

    Canceling a Booking.com Reservation as a Host

    If you’re a property host and need to cancel a guest’s reservation, the process is slightly different. Follow these steps to handle cancellations on your end:

    1. Log in to Your Booking.com Extranet Account Access your property management dashboard by logging in to the Booking.com Extranet.
    2. Click on “Reservations” In the Extranet, locate the “Reservations” tab. This section contains a list of all your upcoming and past bookings.
    3. Select the Reservation You Want to Cancel Identify the specific reservation that needs to be canceled. Click on it to open the booking details.
    4. Click on “Request to Cancel Reservation” Look for the option to request a cancellation. This is typically labeled as “Request to Cancel Reservation.” Click on it to proceed.
    5. Provide a Reason for Cancellation Booking.com requires hosts to specify a reason for cancellation. Common reasons include double bookings, property maintenance issues, or guest requests.
    6. Click on “Send” Once you’ve provided a reason, click on the “Send” button to submit your cancellation request. Booking.com will notify the guest and handle any necessary follow-ups.

    Important Notes and Policies

    1. Understand the Cancellation Policy Before making or canceling a reservation, it’s crucial to review the property’s cancellation policy. This information is typically displayed during the booking process and in your reservation confirmation email.
    2. Penalty-Free Cancellations • If you cancel a reservation within 24 hours of booking, you may be eligible for a penalty-free cancellation, even if the property has a stricter policy. • Some properties offer flexible cancellation options, allowing guests to cancel without penalty up to a specific date.
    3. Communication is Key If you’re unsure about the cancellation process or face difficulties, contact Booking.com’s customer support team. They can provide assistance and clarify any policy-related questions.
    4. For Hosts: Avoid Frequent Cancellations Frequent cancellations by hosts can negatively impact your property’s reputation and ranking on Booking.com. Always strive to honor bookings unless unavoidable circumstances arise.

    Tips for Managing Bookings Effectively

    1. Plan Ahead Carefully plan your trips or property availability to minimize the need for cancellations.
    2. Use Filters When Booking As a guest, use filters to search for properties with flexible cancellation policies.
    3. Monitor Your Calendar Hosts should regularly update their availability to avoid double bookings or scheduling conflicts.
    4. Communicate Early Whether you’re a guest or a host, early communication can prevent misunderstandings and streamline the cancellation process.
    5. Keep Records Save confirmation emails, screenshots of policies, and communication with Booking.com or guests for future reference.

    By following these steps and understanding the nuances of cancellation policies, you can navigate the process confidently and efficiently. Whether you’re a guest managing last-minute changes or a host ensuring a smooth experience for your visitors, being informed is the key to success.

  • How to Cancel a Paypal Automatic Payment? Easy Guide!

    How to Cancel a Paypal Automatic Payment? Easy Guide!

    How to Cancel a Paypal Automatic Payment? In today’s fast-paced digital era, managing online subscriptions and recurring payments has become a crucial aspect of financial management. PayPal, one of the most popular and widely used online payment platforms, offers users the ability to set up automatic payments for convenience. Whether it’s a monthly subscription to your favorite streaming service, a recurring donation to a charity, or a payment plan for an online service, automatic payments can simplify your life. However, there may come a time when you want to cancel an automatic payment for various reasons — perhaps you’re cutting unnecessary expenses, switching to a different service, or no longer using the product or service.

    How to Cancel a Paypal Automatic Payment

    In this article, we’ll walk you through the steps to cancel an automatic payment on PayPal and provide some tips to help you manage your recurring payments more effectively. Whether you’re a seasoned PayPal user or just getting started, understanding this process can save you money and prevent unexpected charges.

    Why Cancel Automatic Payments?

    Before diving into the steps, let’s explore some common reasons why you might want to cancel an automatic payment on PayPal:

    1. Service Discontinuation: You may have stopped using a product or service and no longer need to make recurring payments.
    2. Financial Management: Reducing unnecessary expenses is a smart way to save money and stick to your budget.
    3. Switching Services: You might have found a better or more affordable alternative and no longer need the current subscription.
    4. Avoiding Unwanted Charges: Automatic payments can sometimes continue even if you forget about them, leading to unwanted charges.

    Regardless of the reason, canceling an automatic payment is a straightforward process on PayPal, and here’s how you can do it:

    Step-by-Step Guide to Cancel an Automatic Payment on PayPal

    Follow these simple steps to cancel a PayPal automatic payment:

    1. Log In to Your PayPal Account: Start by visiting the PayPal website or opening the PayPal app on your device. Enter your login credentials to access your account.
    2. Access the Settings Menu: Click the gear icon located in the top-right corner of the PayPal homepage. This will take you to your account settings.
    3. Navigate to the Payments Section: In the settings menu, select the “Payments” tab. This section contains all the information related to your payment preferences and activities.
    4. Manage Automatic Payments: Under the Payments tab, click on “Manage Automatic Payments.” Here, you’ll find a list of merchants and subscriptions linked to your PayPal account.
    5. Select the Payment to Cancel: Browse through the list to locate the automatic payment you wish to cancel. Click on the merchant or subscription name to view more details.
    6. Cancel the Payment: Once you’ve selected the desired payment, click the “Cancel” option next to it.
    7. Confirm the Cancellation: PayPal will ask you to confirm your action. Review the details one last time and confirm the cancellation.

    And that’s it! You’ve successfully canceled the automatic payment.

    What Happens After Canceling?

    After canceling an automatic payment, PayPal will no longer process recurring charges from the merchant or service. However, it’s essential to note a few things:

    • Pending Payments: Any payments already processed before cancellation will not be refunded. You’ll need to contact the merchant for refunds if necessary.
    • Reactivation: If you decide to resume the service in the future, you’ll need to set up the payment again.
    • Merchant Notifications: Some merchants may send you a confirmation email or notification about the cancellation.

    Tips for Managing Automatic Payments Effectively

    1. Regularly Review Your Subscriptions: Make it a habit to check your PayPal account for active subscriptions. This helps you stay aware of where your money is going.
    2. Set Reminders: Use reminders or calendar alerts to review recurring payments, especially if you have multiple subscriptions.
    3. Use Budgeting Tools: Budgeting apps can help you track subscriptions and identify unnecessary expenses.
    4. Communicate with Merchants: If you’re unsure about a payment or want to pause a service temporarily, reach out to the merchant directly.
    5. Monitor Your Email: Many merchants send notifications about upcoming payments. Pay attention to these emails to avoid unexpected charges.

    Common Issues and Solutions

    While canceling an automatic payment is generally straightforward, you may encounter a few challenges:

    • Cannot Find the Payment: Ensure that you’re looking under the correct section (“Manage Automatic Payments”) and that the subscription was set up using PayPal.
    • Merchant Disputes: If you’re having trouble canceling, contact the merchant’s customer support for assistance.
    • Technical Issues: Sometimes, glitches can occur. Try logging out and back into your account, or use a different device or browser.

    Automatic payments offer convenience, but they can also lead to unintended expenses if not managed carefully. By following the steps outlined in this guide, you can take control of your recurring payments on PayPal and ensure your finances are well-organized. Whether you’re canceling a subscription to save money, switching to a different service, or simply decluttering your financial commitments, PayPal makes the process quick and easy.

    Take charge of your finances today by reviewing your automatic payments. A few minutes of effort can make a big difference in managing your budget and avoiding unnecessary costs. Happy saving!

  • How to Cancel a Pandora Subscription? Detailed Guide!

    How to Cancel a Pandora Subscription? Detailed Guide!

    How to Cancel a Pandora Subscription? In today’s fast-paced digital age, subscription-based services have become a cornerstone of modern convenience. From streaming music to binge-worthy TV shows, these services provide endless entertainment at the touch of a button. Pandora, a popular music streaming platform, is no exception. While its features and curated playlists have captivated millions, there may come a time when you decide to cancel your subscription. Whether it’s for budgeting reasons, exploring other platforms, or simply taking a break, knowing how to navigate the cancellation process is crucial. In this guide, we’ll walk you through the steps to cancel your Pandora subscription seamlessly.

    How to Cancel a Pandora Subscription

    Why Cancel Your Pandora Subscription?

    Before diving into the cancellation process, it’s essential to reflect on the reasons behind this decision. Are you looking for a platform that offers different features? Is your current subscription no longer aligning with your budget or listening habits? Or perhaps you’re simply ready for a change? Whatever your reasons, it’s important to approach the decision thoughtfully. Canceling your subscription doesn’t mean saying goodbye to music; it’s about finding the right fit for your lifestyle and needs.

    How to Cancel Your Pandora Subscription?

    Pandora offers multiple methods for canceling a subscription, depending on how you initially signed up. Below, we outline three primary ways to cancel: through the Pandora website, the Pandora app, or the app store where you purchased your subscription.

    1. Canceling via the Pandora Website

    If you manage your Pandora subscription directly through their website, follow these steps:

    Step 1: Log in to Your Pandora Account

    Step 2: Access the Subscriptions Page

    • Click on your profile image located in the upper-right corner of the screen.
    • From the dropdown menu, select Settings.
    • Navigate to the Subscription section.

    Step 3: Cancel Your Subscription

    • Next to your current plan, click on Switch Plan.
    • Select Cancel Subscription.
    • To confirm, enter your password when prompted.

    2. Canceling via the Pandora App

    For those who manage their subscription directly through the Pandora app on a mobile device, here are the steps:

    Step 1: Open the Pandora App

    • Launch the app on your smartphone or tablet.

    Step 2: Access the Menu

    • Tap on the menu icon, usually represented by three horizontal lines, located in the top left corner of the app.

    Step 3: Go to Subscriptions

    • Select Subscription from the menu options.

    Step 4: Cancel Your Subscription

    • Tap on Switch Plans.
    • Choose Cancel Subscription.
    • Confirm the cancellation by entering your password.

    3. Canceling via App Store or Google Play

    If you subscribed to Pandora through an external app store like Apple’s App Store or Google Play, you’ll need to cancel your subscription through that platform. Here’s how:

    For iOS Users (Apple App Store):

    1. Open the Settings app on your iOS device.
    2. Tap on your Apple ID (your name at the top of the screen).
    3. Select Subscriptions.
    4. Find Pandora in the list of active subscriptions.
    5. Tap Cancel Subscription and follow the prompts to confirm.

    For Android Users (Google Play):

    1. Visit the Google Play Subscription page.
    2. Locate Pandora in your list of subscriptions.
    3. Click Cancel Subscription.
    4. Follow the on-screen instructions to finalize the cancellation.

    Important Notes to Keep in Mind

    • Subscription Duration: After canceling, your subscription will remain active until the end of your current billing cycle. This means you can continue to enjoy ad-free listening and other premium features until the cycle concludes.
    • Ad-Supported Free Version: Canceling your subscription doesn’t mean losing access to Pandora entirely. You can still use the platform’s free, ad-supported version.
    • Reactivating Your Subscription: If you decide to return to Pandora’s premium offerings in the future, reactivating your subscription is simple and can be done through the same platforms mentioned above.

    Alternatives to Pandora

    If you’re leaving Pandora to explore other options, the music streaming landscape offers a plethora of choices. Platforms like Spotify, Apple Music, and YouTube Music each have unique features that cater to different listening preferences. Before canceling, consider what you value most in a streaming service—whether it’s curated playlists, exclusive content, or user-friendly interfaces.

    Canceling your Pandora subscription is a straightforward process, whether you choose to do so via the website, app, or external app store. By following the steps outlined in this guide, you can ensure a hassle-free transition. Remember, the decision to cancel doesn’t have to be permanent. Whether you’re exploring other platforms or taking a break, Pandora’s vast music library will always be there should you choose to return. Music is a universal language, and your journey to discover it should be as seamless and enjoyable as possible.

  • How to Cancel a Meeting in Google Calendar? Detailed Guide!

    How to Cancel a Meeting in Google Calendar? Detailed Guide!

    How to Cancel a Meeting in Google Calendar? Time management is an indispensable skill in our fast-paced world. In both professional and personal spheres, the ability to coordinate and schedule effectively can significantly impact productivity. Google Calendar has emerged as a go-to tool for millions, offering a seamless way to organize appointments, meetings, and events. While scheduling is crucial, so is the ability to gracefully manage changes, such as canceling a meeting. In this guide, we’ll explore the step-by-step process of canceling a meeting in Google Calendar, along with tips to ensure clear communication and professionalism. Let’s dive in.

    How to Cancel a Meeting in Google Calendar

    Why Cancelling Meetings with Care Matters?

    Before delving into the technicalities, let’s reflect on the importance of canceling meetings thoughtfully. Meetings are commitments of time and energy for everyone involved. Canceling without proper notice or explanation can lead to confusion, frustration, and even strain professional relationships. By using Google Calendar’s features efficiently, you can ensure that cancellations are communicated clearly and respectfully, preserving trust and collaboration.

    How to Cancel a Meeting in Google Calendar?

    Canceling a meeting in Google Calendar is a straightforward process. Here’s how you can do it step by step:

    1. Open Google Calendar

    • Visit Google Calendar on your web browser.
    • Log in using your Google account credentials. If you’re already logged in, the calendar will open directly, displaying your schedule.

    2. Select the Event You Want to Cancel

    • Locate the meeting or event you wish to cancel. Events are displayed as colored blocks corresponding to their scheduled times.
    • Click on the event to open its details.

    3. Click on the “Delete” Button

    • In the event details window, look for the “Delete” button. This button is typically located in the upper right corner of the interface.
    • Click on the button to initiate the deletion process.

    4. Confirm the Deletion

    • A pop-up window will appear, asking you to confirm the cancellation. This step prevents accidental deletions.
    • Click “Delete” to finalize your decision.

    Once confirmed, the event will be removed from your calendar as well as the calendars of everyone who was invited. This ensures that all participants are automatically informed of the cancellation.

    Managing Recurring Events

    Recurring events pose unique challenges when canceling. Thankfully, Google Calendar provides flexible options:

    1. Canceling a Single Occurrence
      • If the meeting is part of a series but you only need to cancel one instance, select the specific occurrence in the calendar.
      • When prompted, choose the option to “Delete only this event.”
    2. Canceling the Entire Series
      • To cancel all future occurrences of a recurring event, select “Delete all events in the series” when confirming the deletion.

    These options provide the adaptability needed to manage your schedule effectively without disrupting unrelated meetings.

    Notifying Attendees

    Canceling a meeting doesn’t automatically convey the reason or additional details to attendees. To ensure clear communication, consider these steps:

    1. Add a Cancellation Message: Before deleting the event, use the event details window to add a note explaining the cancellation. For instance, you might write: “This meeting has been canceled due to unforeseen circumstances. Apologies for any inconvenience caused.”
    2. Send a Notification: Google Calendar provides an option to notify attendees when you cancel an event. This ensures that everyone is promptly informed.

    Best Practices for Cancelling Meetings

    1. Provide Adequate Notice: Whenever possible, cancel meetings with ample lead time to allow attendees to adjust their schedules.
    2. Be Transparent: Briefly explain the reason for the cancellation to maintain trust and understanding.
    3. Offer Alternatives: If the meeting is essential, propose rescheduling options in the cancellation message.
    4. Follow Up Personally: For high-priority or sensitive meetings, consider following up with key attendees to ensure they received the notification and to discuss next steps.

    Google Calendar is more than just a scheduling tool; it’s a platform that enables effective communication and coordination. By mastering its features, including the ability to cancel meetings seamlessly, you can maintain professionalism and respect in your interactions. Whether it’s a one-time appointment or a recurring event, the steps outlined above will ensure that cancellations are handled efficiently and thoughtfully. Remember, the way you manage changes reflects your commitment to collaboration and mutual respect. So, next time you need to cancel a meeting, let Google Calendar help you do it with ease and grace.

  • How to Cancel a Mail Forwarding? Detailed Guide!

    How to Cancel a Mail Forwarding? Detailed Guide!

    How to Cancel a Mail Forwarding? Mail forwarding is a convenient service offered by the United States Postal Service (USPS) that ensures your mail reaches you when you change addresses temporarily or permanently. It’s a lifesaver when moving homes, traveling for extended periods, or even during business relocations. However, there may come a time when you no longer need this service and wish to cancel it. Knowing the steps to cancel mail forwarding is crucial to ensure a smooth transition and avoid any disruption in receiving your correspondence.

    How to Cancel a Mail Forwarding

    In this article, we will walk you through the steps to cancel mail forwarding, highlight important considerations, and address common questions related to the process. By the end, you’ll have all the information you need to confidently manage your mail forwarding service.

    Why You Might Want to Cancel Mail Forwarding

    There are various reasons you might decide to cancel mail forwarding. Perhaps you have moved into your new home and want to resume receiving mail directly at your new address. Maybe your temporary relocation has ended, or you’ve decided to rely on alternative methods to manage your mail. Regardless of the reason, it’s important to follow the correct procedure to ensure no mail is lost or delayed.

    How to Cancel Mail Forwarding?

    USPS offers two main methods for canceling mail forwarding: online and in person. Each method is designed to be straightforward and user-friendly. Let’s explore both options in detail:

    Canceling Mail Forwarding Online

    One of the most convenient ways to cancel mail forwarding is through the USPS website. Here are the steps to do so:

    1. Visit the USPS Website
    2. Enter Your Zip Code and Confirmation Code
      • You will need the zip code associated with your address and the confirmation code you received when you initially set up the mail forwarding service. This code is usually included in the confirmation email or letter provided by USPS.
    3. Log In to Your Profile
      • If you have a USPS account, log in using your credentials. If you don’t have an account, you may need to create one or use the details provided during the initial mail forwarding setup.
    4. Edit or Cancel Your Mail Forwarding Request
      • Once logged in, navigate to the mail forwarding section of your profile. You’ll have the option to edit your forwarding details or cancel the service entirely. Follow the prompts to complete the process.

    Canceling Mail Forwarding In Person

    If you prefer a more hands-on approach, visiting your local post office is an excellent alternative. Here’s how to proceed:

    1. Visit Your Local Post Office
      • Locate the nearest USPS post office using the USPS Locator.
    2. Inform the Staff of Your Request
      • Let the postal staff know that you wish to cancel your mail forwarding service. They will guide you through the necessary steps.
    3. Provide Necessary Information
      • Be prepared to share your confirmation code and any other details associated with your mail forwarding request. If you don’t have your confirmation code, the staff may ask for identification or additional verification details.
    4. Complete the Cancellation
      • The post office staff will process your request and confirm that your mail forwarding has been canceled.

    Important Notes

    • Confirmation Code: This code is critical for managing your mail forwarding service online or in person. If you’ve misplaced it, contact your local post office for assistance.
    • Timing: Ensure you cancel mail forwarding promptly to avoid unnecessary delays or misrouted mail.
    • Verification: USPS may require proof of identity to verify that you’re authorized to make changes to the mail forwarding request.

    Frequently Asked Questions

    What Happens if I Don’t Cancel Mail Forwarding?

    If you don’t cancel mail forwarding, USPS will continue redirecting your mail to the forwarding address until the service expires. This could result in delays or missed mail if you’ve already moved back to your permanent address.

    Can I Modify My Forwarding Request Instead of Canceling?

    Yes, USPS allows you to update or modify your mail forwarding details online or in person. This can be useful if your plans change, and you need to extend the forwarding period or adjust the forwarding address.

    Is There a Fee for Canceling Mail Forwarding?

    Canceling mail forwarding is generally free of charge. However, it’s always a good idea to confirm with USPS if there are any specific conditions or fees associated with your request.

    How Long Does It Take to Process a Cancellation?

    Online cancellations are usually processed immediately, while in-person requests may take a day or two, depending on the post office’s workload.

    Canceling mail forwarding with USPS is a simple process that ensures your mail is delivered to the correct address without interruptions. Whether you choose to manage the cancellation online or visit your local post office, the key is to have all the necessary details on hand, including your confirmation code and identification.

    By following the steps outlined in this guide, you can seamlessly transition back to receiving mail directly at your desired address. Remember, timely action and accurate information are essential to avoid any disruptions in your mail service.

  • How to Cancel a Line T Mobile? Detailed Guide!

    How to Cancel a Line T Mobile? Detailed Guide!

    How to Cancel a Line T Mobile? Canceling a T-Mobile line might seem like a daunting task, but with the right steps and understanding of the process, it can be a straightforward experience. Whether you are looking to switch providers, cut down on expenses, or adjust your communication needs, canceling your T-Mobile service requires attention to detail to avoid unnecessary charges or complications. In this guide, we will walk you through everything you need to know to cancel your T-Mobile line efficiently, with tips and insights to make the process as smooth as possible.

    How to Cancel a Line T Mobile

    The Importance of Preparing Before Cancellation

    Before you proceed to cancel your T-Mobile line, it is essential to be fully prepared. Taking a few preparatory steps can save you time, money, and potential headaches. Here are some key considerations:

    1. Review Your Contract Terms: Check the terms and conditions of your agreement with T-Mobile. Are you on a fixed-term contract, or are you subscribed to a month-to-month plan? Knowing your contract type will help you understand any potential fees or requirements associated with cancellation.
    2. Assess Your Outstanding Balances: Ensure that all outstanding balances, including device payments, service charges, and taxes, are cleared. Leaving balances unpaid could lead to service disruptions or penalties.
    3. Backup Important Data: If you’re switching devices or providers, make sure to back up your contacts, photos, and other essential data. Losing valuable information can be a frustrating consequence of transitioning services.
    4. Explore Alternative Options: Consider whether canceling is the best course of action. T-Mobile offers a variety of plans and services that might better suit your needs. Speaking with a customer service representative could provide alternative solutions, such as a more affordable plan or suspension of service instead of cancellation.

    With these preparations in mind, let’s delve into the specific methods you can use to cancel your T-Mobile line.

    How to Cancel Your T-Mobile Line?

    T-Mobile offers multiple avenues for canceling your service, ensuring flexibility for its customers. Here are the primary methods you can use:

    1. Calling T-Mobile Customer Service

    One of the most direct ways to cancel your T-Mobile line is by contacting their customer service team. Follow these steps:

    • Dial 1-877-746-0909 from any phone, or simply call 611 if you’re using a T-Mobile device.
    • Be prepared to verify your account information. This typically includes your account number, the last four digits of your Social Security Number (SSN), or your account PIN.
    • Clearly state your intention to cancel your service. The representative may ask for feedback or offer retention deals to keep you as a customer. If you’ve made up your mind, politely decline these offers and confirm the cancellation process.
    • Request a written or emailed confirmation of your cancellation. This ensures there’s a record of the transaction should any disputes arise later.

    2. Visiting the T-Mobile Website

    Another convenient option is to initiate the cancellation process online. Follow these steps:

    • Log in to your account on the T-Mobile website.
    • Navigate to the support or account settings section.
    • Look for an option to manage or cancel your line. Depending on your account type, you may need to contact customer service for final confirmation.
    • Follow the on-screen prompts and ensure all necessary information is provided.
    • Similar to the phone method, request a confirmation of your cancellation via email.

    Important Notes to Keep in Mind

    When canceling your T-Mobile line, there are several critical points to remember:

    Early Termination Fees (ETFs)

    If you’re on a fixed-term contract and decide to cancel before the contract’s end date, you may be subject to early termination fees. These fees can vary depending on your agreement. Carefully review your contract or speak with a T-Mobile representative to understand the financial implications of canceling early.

    Outstanding Balances

    Before finalizing your cancellation, ensure that all outstanding balances are paid in full. This includes any remaining payments for devices purchased through T-Mobile’s financing options. Unresolved balances can lead to credit issues and complications with future service providers.

    Confirmation of Cancellation

    Always request a written or emailed confirmation of your cancellation. This documentation serves as proof that you’ve terminated your service and can be crucial if any billing discrepancies arise in the future.

    Retention Offers

    When contacting T-Mobile to cancel your line, you may be offered retention deals to stay with the company. These offers might include discounts, upgraded plans, or additional perks. While these deals can be tempting, ensure they align with your needs and budget before accepting.

    Canceling your T-Mobile line is a significant decision that requires careful consideration and preparation. By understanding the cancellation process, potential fees, and necessary steps, you can navigate this transition smoothly. Whether you choose to call customer service or manage your account online, always prioritize clear communication and thorough documentation.

    If you’re switching to a new provider, take the time to compare plans, features, and coverage to ensure you’re making the best choice for your communication needs. Remember, a well-informed decision today can save you time and money in the long run.

    We hope this guide has provided you with the insights needed to confidently cancel your T-Mobile line. Should you have any additional questions or concerns, T-Mobile’s support team is available to assist you every step of the way.

  • How to Cancel a Digital Order from Amazon? Detailed Guide!

    How to Cancel a Digital Order from Amazon? Detailed Guide!

    How to Cancel a Digital Order from Amazon? In today’s fast-paced digital world, platforms like Amazon have become indispensable for accessing everything from books to music and streaming services. However, as convenient as these digital purchases are, there may come a time when you need to cancel an order—perhaps it was made by mistake, or the content no longer suits your needs. Whatever the reason, understanding how to navigate the cancellation process is essential for a hassle-free experience. In this comprehensive guide, we’ll delve into how to cancel digital orders on Amazon, provide tips for a smoother process, and explore key considerations that you should be aware of.

    How to Cancel a Digital Order from Amazon

    Understanding Digital Orders on Amazon

    Amazon’s digital ecosystem is vast, encompassing Kindle books, Amazon Prime Video subscriptions, Amazon Music, and more. Each of these services operates under distinct policies, making it crucial to familiarize yourself with the specific terms and conditions of the product or subscription you wish to cancel. For example, while most Kindle books are refundable within a set timeframe, subscriptions like Amazon Prime Video or Amazon Music have different cancellation rules.

    Let’s walk through the general steps to cancel a digital order on Amazon, followed by specific examples and essential tips to make the process smoother.

    How to Cancel Digital Orders on Amazon?

    1. Check Your Order Details

    The first step in cancelling any digital order is to review the details of your purchase. Here’s how you can do it:

    • Access “Your Orders”: Log in to your Amazon account and navigate to the “Your Orders” section on the website or app. This is the central hub where all your purchases—digital and physical—are listed.
    • Locate the Order: Scroll through your orders to find the specific digital content you want to cancel. This could be an ebook, a movie rental, or a subscription.
    • Look for Options: Within the order details, search for a “Cancel” or “Refund” button. This option will often indicate whether cancellation is available and outline any associated terms.

    2. Initiate the Cancellation

    Once you’ve identified the order, the next step is to begin the cancellation process:

    • Click the “Cancel” or “Refund” Button: Select this option to proceed. Depending on the content type, the button may be labeled differently (e.g., “Return for Refund” for Kindle books).
    • Follow On-Screen Instructions: Amazon will guide you through a series of steps to finalize your cancellation. You may be asked to provide a reason for the cancellation, such as accidental purchase or dissatisfaction with the content.

    3. Confirm the Cancellation

    Before finalizing, double-check the cancellation details:

    • Review the Information: Ensure that all details—such as the refund amount or cancellation confirmation—are correct.
    • Confirm Your Request: Click the confirmation button to complete the process. You should receive a notification or email confirming the cancellation.

    Important Notes About Cancelling Digital Orders

    Cancellation Policies Vary

    Not all digital content on Amazon is eligible for cancellation or refund. For instance:

    • Kindle Books: Most Kindle books can be returned within 7 days of purchase for a full refund. However, this policy does not apply to Kindle Unlimited titles that are borrowed, not purchased.
    • Amazon Prime Video: If you cancel a subscription, you’ll retain access until the end of your billing cycle.
    • Amazon Music: Refunds are typically only available for unused portions of your subscription fee.

    Refund Eligibility

    Refunds are not guaranteed for all cancellations. Factors that may affect your eligibility include:

    • Content Type: Certain digital products, such as downloaded music or videos, may not be refundable.
    • Timing: Refund requests made outside the allowed timeframe (e.g., after 7 days for Kindle books) may be denied.
    • Reason for Cancellation: Refunds are more likely to be approved for accidental purchases than for dissatisfaction with content.

    Customer Service Assistance

    If you encounter any issues during the cancellation process or cannot locate a cancellation option, Amazon Customer Service is there to help. You can contact them through the following methods:

    • Live Chat: Accessible via the Amazon website or app.
    • Phone Support: Request a call back from the customer service team.
    • Email: Use the Amazon Help page to send a detailed inquiry.

    Specific Examples of Digital Order Cancellations

    Kindle Books

    Kindle books are among the most straightforward digital products to cancel. Here’s a quick guide:

    1. Go to “Your Orders” and locate the book.
    2. Click “Return for Refund” within 7 days of purchase.
    3. Confirm the cancellation.

    Amazon Prime Video

    For Prime Video subscriptions:

    1. Navigate to the “Memberships & Subscriptions” section in your account.
    2. Select “Cancel Subscription.”
    3. Follow the prompts to confirm. Note that you’ll retain access to Prime Video until the end of your billing cycle.

    Amazon Music

    To cancel an Amazon Music subscription:

    1. Access “Your Memberships & Subscriptions.”
    2. Select “Amazon Music” and choose “Cancel Subscription.”
    3. Confirm your request. Refunds for unused portions of your subscription may apply.

    Tips for a Smooth Cancellation Process

    1. Act Quickly: If you realize you’ve made an accidental purchase, address it as soon as possible to maximize your chances of a refund.
    2. Keep Records: Save confirmation emails and screenshots of cancellation steps for your records.
    3. Understand the Policies: Familiarize yourself with Amazon’s terms of use for the specific service or product you’re using.
    4. Be Clear with Customer Service: If you need to contact Amazon for assistance, provide all relevant details, including order numbers and the reason for cancellation.

    Cancelling digital orders on Amazon doesn’t have to be a daunting task. By understanding the platform’s policies and following the steps outlined in this guide, you can ensure a smooth and efficient process. Whether you’re returning a Kindle book, ending a subscription, or seeking a refund for other digital content, the key is to act promptly and be informed. Should you encounter any difficulties, Amazon’s customer service team is always ready to assist.

    Digital purchases are convenient, but life happens, and cancellations are sometimes necessary. Armed with this knowledge, you can confidently manage your Amazon digital orders and focus on enjoying the content that truly suits your needs.

  • How to Cancel a Buyers Bid On Ebay? Detailed Guide!

    How to Cancel a Buyers Bid On Ebay? Detailed Guide!

    How to Cancel a Buyers Bid On Ebay? Participating in an eBay auction can be thrilling. Watching the clock tick down while vying for the best price adds excitement to online shopping. However, there might be instances when you need to cancel a bid you’ve placed. Perhaps you made a mistake, found a better deal elsewhere, or had a change of heart. Whatever the reason, understanding eBay’s bid cancellation policies and the steps involved is crucial for a smooth resolution.

    How to Cancel a Buyers Bid On Ebay

    In this guide, we will walk you through the process of retracting a bid on eBay, highlighting the limitations, exceptions, and best practices. Additionally, we’ll provide tips on communicating with sellers and avoiding pitfalls that could negatively impact your account. Let’s dive in!

    Understanding eBay’s Bid Retraction Policies

    Before discussing the steps to cancel a bid, it’s essential to understand the basic policies eBay enforces regarding bid retractions:

    1. Time Limitations:
      • If the auction ends within 12 hours, you generally have up to 1 hour to retract your bid.
      • For auctions with more than 12 hours remaining, you have more flexibility to retract your bid.
    2. Exceptions:
      • If the auction has already ended, you can no longer retract your bid through eBay’s system. In such cases, contacting the seller directly is your only option.
    3. Seller Discretion:
      • While eBay allows bid retractions under certain conditions, the final decision often rests with the seller. They can choose whether or not to accommodate your request.
    4. Impact on Your Account:
      • Frequent bid retractions may result in negative feedback or warnings from eBay, potentially affecting your account’s standing.

    Step-by-Step Guide to Retracting a Bid

    If you’ve decided to retract a bid, follow these steps to do so effectively:

    1. Access Your eBay Account

    • Log in to your eBay account and navigate to the “My eBay” section.
    • Select the “Bids/Offers” tab to view your active bids.

    2. Find the Item

    • Locate the item for which you wish to retract your bid. Ensure you have the item details handy, such as the auction number or title.

    3. Use the “Retract Bid” Option

    • If the bid retraction option is available, you’ll see a “Retract Bid” button next to the item. Click on it.

    4. Confirm Your Retraction

    • Follow the on-screen instructions to complete the process. eBay may ask you to select a reason for the retraction, such as placing an incorrect bid amount or bidding by mistake.

    What to Do If You Can’t Retract a Bid?

    In some scenarios, you may be unable to retract your bid using eBay’s automated system. Here’s what you can do:

    1. Contact the Seller: Reach out to the seller via eBay’s messaging system. Explain your situation politely and provide a valid reason for wanting to cancel the bid. Sellers are often willing to help if approached respectfully.
    2. Avoid Paying for the Item: If the seller refuses to cancel the bid, you can choose not to pay for the item. However, this may lead to negative feedback and potential consequences for your account.
    3. Check eBay’s Policies: Refer to eBay’s official policies for more guidance. Staying informed about their rules can help you handle such situations better in the future.

    Best Practices for eBay Bidding

    To avoid the need for bid cancellations, consider the following tips:

    1. Double-Check Before You Bid: Verify the item details, including the price, shipping costs, and condition, before placing a bid.
    2. Set a Budget: Determine your maximum bid amount in advance and stick to it. This can help prevent impulsive bidding.
    3. Use eBay’s Bid Retraction Policy Sparingly: Frequent retractions can damage your reputation on the platform. Use this option only when absolutely necessary.
    4. Communicate Clearly: If you need to cancel a bid, always communicate with the seller in a polite and timely manner. This increases the likelihood of a favorable resolution.

    Canceling a bid on eBay is a straightforward process in most cases, but it’s not without its limitations. By understanding eBay’s policies, following the steps outlined above, and practicing responsible bidding habits, you can minimize disruptions and maintain a positive experience on the platform.

    Remember, eBay’s official policies are your best resource for accurate and up-to-date information. If you’re ever unsure about your options, don’t hesitate to consult their help center or contact customer support. Happy bidding!