Author: Sharad Doshi

  • How to Cancel Calendar Events On Iphone? Effortless Guide!

    How to Cancel Calendar Events On Iphone? Effortless Guide!

    How to Cancel Calendar Events On Iphone? In today’s fast-paced digital world, managing your time effectively is critical. Your iPhone’s Calendar app is a powerful tool to help organize your schedule, coordinate meetings, and keep track of important dates. However, life is unpredictable, and plans often change. Whether it’s a canceled meeting, a rescheduled event, or simply the need to declutter your calendar, knowing how to efficiently manage and delete events is essential. In this guide, we’ll walk you through the step-by-step process to cancel calendar events on your iPhone, ensuring your digital planner remains as dynamic as your life.

    How to Cancel Calendar Events On Iphone

    Why Managing Calendar Events Is Important?

    A well-organized calendar not only saves you time but also reduces stress. It helps you stay focused, avoid double bookings, and ensure that you’re always prepared. Deleting or declining unnecessary events is just as important as adding new ones. It allows you to keep your schedule streamlined and relevant, enabling you to focus on the events that truly matter.

    Let’s dive into how you can cancel different types of calendar events on your iPhone, whether they’re events you created, invitations you received, or recurring appointments.

    How to Cancel Calendar Events on Your iPhone?

    For Events You Created

    If you’ve created an event on your iPhone and it’s no longer needed, follow these simple steps to delete it:

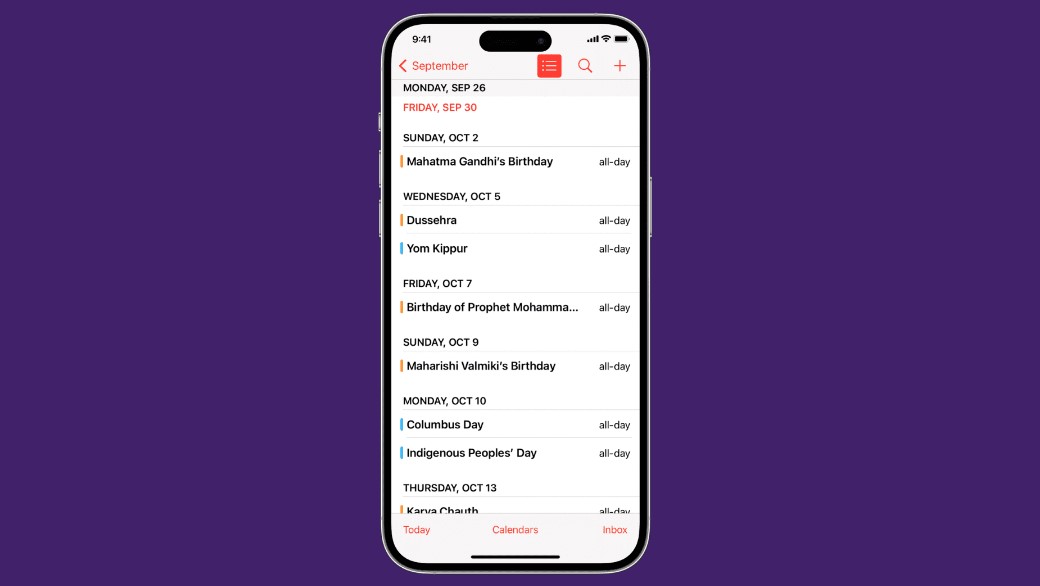
    1. Open the Calendar app on your iPhone.
    2. Find and tap on the event you wish to delete.
    3. Scroll to the bottom and tap “Delete Event.”
    4. If it’s a recurring event, a pop-up will appear with options:
      • Delete This Event Only: Removes just the selected occurrence.
      • Delete All Future Events: Cancels all upcoming instances of the recurring event.

    Choose the option that best suits your needs.

    For Events You Were Invited To

    When dealing with events you didn’t create but were invited to, the process differs slightly:

    1. Open the Calendar app and locate the event.
    2. Tap on the event to view its details.
    3. Instead of “Delete Event,” you may see options such as “Decline” or “Maybe.”
      • Selecting “Decline” will remove the event from your calendar and notify the organizer that you won’t be attending.
      • Choosing “Maybe” allows you to tentatively accept while keeping the event visible on your calendar.

    This approach ensures you’re respectful of the organizer’s time and effort.

    Important Notes

    Managing Recurring Events

    Recurring events are designed to save time when scheduling repeating appointments, but they can become cluttered if no longer relevant. When deleting a recurring event, you’ll typically have these options:

    • This Instance Only: Deletes just one occurrence.
    • All Future Events: Removes all upcoming instances while preserving past entries.
    • All Events (Past and Future): Completely erases the event from your calendar history.

    Choose wisely based on how you’d like your calendar to appear.

    Subscribed Calendars

    Subscribed calendars, such as those for public holidays or sports schedules, operate differently. To remove events from a subscribed calendar:

    1. Open the Calendar app and tap “Calendars” at the bottom of the screen.
    2. Find the calendar you want to unsubscribe from and tap the “i” icon next to it.
    3. Tap “Unsubscribe” and confirm your choice.

    This action removes all events associated with that calendar from your iPhone.

    Synced Calendars

    If you use iCloud or another synchronization service (e.g., Google Calendar, Outlook), any changes made on your iPhone—including deletions—will reflect across all connected devices. This feature ensures consistency but requires careful handling to avoid unintended data loss.

    Managing your calendar effectively is key to staying organized in an increasingly busy world. By mastering the steps to cancel events, you’ll maintain a clutter-free schedule and ensure that your time is spent on what truly matters. Whether it’s a last-minute change or a long-term adjustment, the Calendar app on your iPhone provides the flexibility to adapt seamlessly to life’s shifting demands.

    So, the next time plans change, don’t stress. With the tips outlined in this guide, you’re just a few taps away from keeping your calendar in perfect order. Happy planning!

  • How to Cancel Britbox On Amazon Prime? Proven Methods!

    How to Cancel Britbox On Amazon Prime? Proven Methods!

    How to Cancel Britbox On Amazon Prime? BritBox is a beloved streaming service offering a vast library of British TV shows, movies, and exclusive content. However, there may come a time when you decide to cancel your subscription, whether due to a lack of time, financial reasons, or simply the desire to explore other streaming platforms. Canceling your BritBox subscription via Amazon Prime is a straightforward process, but it requires following the correct steps to ensure the cancellation is successful. This guide will walk you through the process while answering common questions you may have. Let’s dive in!

    How to Cancel Britbox On Amazon Prime

    Why You Might Want to Cancel Your BritBox Subscription?

    Before we delve into the steps, it’s worth considering why you might want to cancel BritBox. While the service offers unparalleled access to British entertainment, every subscription service has its pros and cons. Common reasons for canceling include:

    • Financial Savings: Cutting back on expenses by reducing the number of streaming services you subscribe to.
    • Limited Time for Streaming: Busy schedules may mean you’re not using the service enough to justify its cost.
    • Exploring Alternatives: Trying out other streaming platforms that offer different types of content.
    • Temporary Break: Sometimes, it’s nice to take a break and return when there’s new or exciting content.

    If you’ve made up your mind, the steps below will guide you through canceling your BritBox subscription on Amazon Prime.

    Step-by-Step Guide to Cancel BritBox on Amazon Prime

    1. Go to Account & Settings

    The first step in canceling your BritBox subscription is accessing your Amazon Prime Video account settings. Here’s how:

    • Open the Amazon Prime Video app on your device or go to the Amazon Prime Video website on a browser.
    • Log in to your account if you’re not already signed in.
    • Navigate to the Account & Settings section. On the app, this is often found in the settings menu. On the website, you can locate it by clicking your profile icon and selecting the option.

    2. Find Your Subscriptions

    Once you’re in the Account & Settings menu:

    • Look for the Your subscriptions tab. This is typically displayed in the top menu or as an option within your settings.
    • Click or tap on this option to view all the subscriptions associated with your Amazon account.

    3. Locate the BritBox Subscription

    Under the list of subscriptions:

    • Scroll through the active subscriptions until you find the BritBox add-on.
    • Make sure you’ve identified the correct subscription to avoid canceling the wrong service.

    4. Unsubscribe

    To cancel your BritBox subscription:

    • Select the Unsubscribe option next to the BritBox listing.
    • Follow the on-screen prompts to confirm your cancellation.

    Once confirmed, your subscription will be scheduled to end at the conclusion of the current billing cycle. This means you’ll still have access to BritBox content until the next billing date.

    Important Notes About Cancelling BritBox

    Cancellation Timing

    Even after canceling your BritBox subscription, you will retain access to the service until the next billing date. For instance, if your billing cycle renews on the 15th of each month and you cancel on the 5th, you can continue enjoying BritBox until the 15th.

    Refund Policies

    In some cases, Amazon may offer a self-service refund if you cancel early in the billing cycle and have not used the service extensively. However, refunds are not guaranteed, so it’s essential to review the terms and conditions or contact Amazon customer support for clarification.

    Apple Subscriptions

    If you initially subscribed to BritBox through Apple’s App Store, the cancellation process differs. You will need to:

    • Open your Apple Settings on your iPhone, iPad, or Mac.
    • Go to Subscriptions and locate the BritBox subscription.
    • Tap Cancel Subscription and confirm your choice.

    Subscriptions purchased through Apple cannot be canceled directly through Amazon Prime, so make sure you’re following the correct steps based on your initial purchase method.

    Frequently Asked Questions

    Can I restart my BritBox subscription later?

    Absolutely! If you change your mind, you can resubscribe to BritBox at any time via Amazon Prime or directly through BritBox’s website. Your watch history and preferences may even remain intact if you use the same account.

    What happens to my BritBox account if I cancel on Amazon Prime?

    Canceling through Amazon Prime only terminates the subscription associated with your Amazon account. If you’ve created a separate BritBox account, it’s a good idea to double-check that the cancellation is reflected there as well.

    Will I lose access to BritBox immediately after canceling?

    No, you will retain access until the end of your current billing period. After that, the service will no longer be available unless you resubscribe.

    What should I do if I face issues during the cancellation process?

    If you encounter any technical difficulties or are unable to locate your subscription settings, consider reaching out to Amazon’s customer support team for assistance. They can guide you through the process or troubleshoot any issues.

    Canceling a subscription doesn’t have to be a stressful process. Whether you’re moving on from BritBox temporarily or permanently, following these clear steps will ensure a smooth cancellation experience. Remember to review the timing of your billing cycle, check for potential refunds, and use the correct method depending on how you originally subscribed. With this guide, you can confidently manage your streaming subscriptions and make choices that best fit your lifestyle.

    If you’re still unsure about canceling, consider exploring the newest content on BritBox to ensure you’re making an informed decision. Whatever you decide, happy streaming!

  • How to Cancel Brazzers Account? Proven Methods!

    How to Cancel Brazzers Account? Proven Methods!

    How to Cancel Brazzers Account? In today’s digital era, subscription-based services have become increasingly popular. While these platforms offer convenience and access to premium content, there might come a time when you decide that a specific subscription is no longer for you. If you’ve found yourself considering canceling your Brazzers account, you’re not alone. Whether it’s for budgetary reasons, shifting interests, or simply a change in lifestyle, understanding how to cancel your subscription efficiently and effectively is crucial. This guide will walk you through the process step-by-step, ensuring you can navigate the cancellation process with ease and confidence.

    How to Cancel Brazzers Account?

    Brazzers, as one of the leading adult entertainment platforms, offers its subscribers access to premium content. However, like many subscription-based services, canceling an account isn’t always as straightforward as signing up. This article provides clear and concise instructions on how to cancel your Brazzers account, as well as additional tips to make the process as smooth as possible. But before diving into the steps, let’s explore why understanding the cancellation process is so important.

    Why Knowing the Cancellation Process Matters?

    1. Avoid Unnecessary Charges: Subscriptions often renew automatically. Without proper cancellation, you could be charged for another billing cycle even if you no longer intend to use the service.
    2. Maintain Financial Control: Understanding how to cancel ensures you’re in control of your finances and only paying for services you actively use.
    3. Simplify Account Management: Having a clear understanding of the cancellation process reduces stress and saves time.
    4. Prevent Misunderstandings: Miscommunication with customer support or missed steps in the cancellation process can lead to complications. Following the correct procedure helps avoid these issues.

    Now that we’ve established why canceling correctly is important, let’s move on to the detailed steps for how to cancel your Brazzers account.

    How to Cancel Your Brazzers Account?

    Canceling your Brazzers subscription can typically be done in two ways: through the online platform or by contacting customer support. Let’s explore both methods in detail.

    1. Canceling Online

    One of the easiest ways to cancel your Brazzers account is directly through their online platform. Here’s how:

    1. Log in to Your Account: Start by visiting the Brazzers website and logging into your account using your credentials.
    2. Navigate to Account Settings: Once logged in, look for an option labeled “Account Settings” or “Subscription Page.” This is usually located in the top-right menu or under your profile.
    3. Find the Cancellation Option: Within the account settings, locate the “Cancel Membership” button or a similarly labeled option.
    4. Follow the Instructions: Click on the cancellation option and follow the on-screen instructions. This may include confirming your decision and providing a reason for cancellation.
    5. Confirmation: Once the process is complete, you should receive a confirmation message or email indicating that your subscription has been canceled.

    2. Contacting Customer Support

    If you’re unable to cancel online or prefer to speak with someone directly, contacting Brazzers’ customer support team is another effective option. Follow these steps:

    1. Locate Customer Support Information: Visit the Brazzers website and navigate to their “Contact Us” page. Here, you’ll find the necessary contact details, such as a phone number or email address.
    2. Reach Out: Use the provided contact method to get in touch with their customer support team. Clearly state that you would like to cancel your account.
    3. Provide Necessary Information: Be prepared to verify your account details for security purposes. This may include your email address, username, or subscription ID.
    4. Request Confirmation: Once your cancellation request has been processed, ask for a confirmation email or reference number for your records.

    Important Notes to Keep in Mind

    When canceling your Brazzers account, there are a few additional considerations to ensure a smooth experience:

    • Review the Cancellation Policy:
      • Before proceeding with cancellation, familiarize yourself with Brazzers’ terms of service or subscription agreement. These documents outline important details, including:
        • Refund Policy: Determine whether you are eligible for a refund for any unused portion of your subscription.
        • Cancellation Fees: Check if any fees apply for canceling your subscription before the end of the billing cycle.
    • Keep a Record:
      • After canceling your subscription, save any confirmation emails or messages from Brazzers. These serve as proof of cancellation in case of future disputes.
    • Timing Matters:
      • To avoid being charged for the next billing cycle, initiate your cancellation at least a few days before your renewal date.

    Disclaimer

    As an AI-generated guide, this article provides general information on how to cancel a Brazzers account. It’s important to note:

    • Specific steps may vary based on your location, subscription type, or updates to Brazzers’ policies.
    • Always refer to the official Brazzers website or contact their customer support team for the most accurate and up-to-date information.
    • This article does not constitute financial or legal advice. For personalized assistance, consult with a qualified professional.

    Canceling your Brazzers subscription doesn’t have to be a daunting task. By following the steps outlined in this guide, you can ensure a hassle-free experience while maintaining control over your subscriptions. Whether you choose to cancel online or through customer support, being informed about the process and your rights as a subscriber is key.

    Remember, it’s always a good idea to stay organized by keeping records of your cancellation request and any related correspondence. Doing so will provide peace of mind and safeguard you against unexpected charges.

    Taking control of your subscriptions is an empowering step towards better financial management. If you’re ready to move forward, now’s the time to put this guide into action and confidently cancel your Brazzers account.

  • How to Cancel Autocorrect On Android? Proven Methods!

    How to Cancel Autocorrect On Android? Proven Methods!

    How to Cancel Autocorrect On Android? In today’s fast-paced digital world, smartphones have become an integral part of our daily lives. They help us stay connected, manage our tasks, and even express our thoughts in writing. One of the most commonly used features of modern smartphones is the keyboard, which allows us to communicate via text messages, emails, social media posts, and more. Among the many conveniences provided by smartphone keyboards, autocorrect stands out as a double-edged sword. While it can be helpful in correcting typos and ensuring smoother communication, it can also lead to embarrassing mistakes and misunderstandings. This is especially true when autocorrect changes words in unintended ways or misunderstands the context of what you’re trying to convey.

    How to Cancel Autocorrect On Android

    If you’ve ever sent a message only to realize that autocorrect has altered your intended meaning, you’re not alone. Many users find autocorrect to be more of a hindrance than a help, particularly when it comes to slang, technical jargon, or unique names. For those who value precision and control over their words, disabling autocorrect can be a game-changer. Fortunately, Android devices provide flexible options to customize or completely disable this feature, allowing you to take full control of your keyboard experience.

    In this guide, we’ll walk you through the step-by-step process of turning off autocorrect on your Android device. Whether you’re using Gboard, Samsung Keyboard, or another virtual keyboard, the steps are straightforward and easy to follow. Additionally, we’ll explore alternative methods to manage autocorrect, such as adding frequently used words to your personal dictionary. Let’s dive in and regain control over your typing experience.

    Here’s how to cancel autocorrect on your Android device:

    1. Access Keyboard Settings:

    To begin, you need to access the settings for your keyboard. This is where you can make changes to the autocorrect feature and other related options. Follow these steps:

    • Go to Settings: Open the Settings app on your phone. You can usually find it on your home screen or in your app drawer.
    • Find Language & Input: Look for a menu option labeled “System,” “Language & Input,” or “General Management.” The exact wording may vary depending on your Android version and phone manufacturer.
    • Select Your Keyboard: Tap on “Virtual Keyboard” or “On-screen keyboard.” This will display a list of keyboards installed on your device. Select the one you’re using, such as Gboard, Samsung Keyboard, or another third-party keyboard.

    2. Disable Autocorrect:

    Once you’re in the keyboard settings, follow these steps to turn off autocorrect:

    • Find Text Correction: Look for a menu option labeled “Text correction,” “Smart typing,” or something similar. This is where you’ll find autocorrect-related settings.
    • Toggle Off Autocorrect: Locate the “Auto-correction” toggle or switch and turn it off. This will disable the autocorrect feature, giving you complete control over what you type.

    3. Alternative: Add Words to Dictionary

    If you prefer to keep autocorrect enabled but want to prevent it from changing specific words, you can add those words to your personal dictionary. Here’s how:

    • Access Dictionary: In your keyboard settings, find an option labeled “Dictionary” or “Personal dictionary.”
    • Add Words: Add frequently used words or phrases that autocorrect tends to alter. This ensures that these words will no longer be flagged or changed by the autocorrect feature.

    Notes and Variations:

    It’s important to note that the exact steps may vary slightly depending on your Android version and the specific keyboard app you’re using. For instance, the settings for Gboard might look different from those of the Samsung Keyboard or a third-party keyboard app like SwiftKey. Regardless of the differences, the general process remains the same: accessing your keyboard settings, locating the autocorrect option, and making the necessary adjustments.

    Autocorrect is a useful tool, but it’s not without its flaws. For users who value precise communication, disabling or customizing this feature can significantly enhance the typing experience. By following the steps outlined in this guide, you can take control of your keyboard and ensure that your words are conveyed exactly as you intend. Remember, technology is meant to serve you, not frustrate you—so don’t hesitate to tweak your settings to suit your needs.

  • How to Cancel AT&T Wireless? Proven Methods!

    How to Cancel AT&T Wireless? Proven Methods!

    How to Cancel AT&T Wireless? Canceling a wireless service might seem like a daunting task, especially when dealing with one of the largest telecommunications providers like AT&T. Whether you’re switching to a new carrier, moving to an area with limited AT&T coverage, or simply reevaluating your mobile needs, understanding the cancellation process is crucial to avoid unnecessary charges or complications. This guide provides you with detailed instructions, essential considerations, and tips to ensure a smooth and hassle-free cancellation process.

    How to Cancel AT&T Wireless

    Why People Cancel Their Wireless Services

    There are many reasons why individuals decide to part ways with their wireless providers. Some of the most common reasons include:

    1. Cost Concerns: Monthly bills can add up, and users may find more affordable plans elsewhere.
    2. Coverage Issues: Poor network coverage in certain areas can lead customers to explore other options.
    3. Device Upgrades: Sometimes, customers switch carriers to take advantage of better deals on new devices.
    4. Customer Service Experience: A negative experience with customer support can motivate users to make a change.
    5. Lifestyle Changes: Relocation, reduced need for mobile services, or financial adjustments can also lead to cancellations.

    If you’ve decided that canceling your AT&T Wireless service is the best option for you, this guide will walk you through all the steps, ensuring you’re prepared for what lies ahead.

    Important Notes Before Canceling

    Before diving into the cancellation process, it’s essential to understand the potential implications:

    1. Early Termination Fee (ETF): If you’re under a service agreement, canceling before the end of your contract may result in an early termination fee. This fee is typically outlined in your contract and can vary based on the remaining length of your agreement.
    2. Installment Plans: If you’ve purchased a device on an installment plan, you’ll need to pay off the remaining balance of your device before completing the cancellation process.
    3. Return Policy: If you’re canceling within the first 14 days of your service (often referred to as the “cooling-off period”), you may qualify for a full refund, provided you return the device in good condition.
    4. Final Bill: After canceling, you’ll receive a final bill that includes any remaining balances, prorated charges, or applicable fees.

    How to Cancel Your AT&T Wireless Service?

    There are three primary methods to cancel your AT&T Wireless service: by phone, online, or in-store. Below is a step-by-step guide for each method.

    1. Canceling by Phone

    One of the most convenient ways to cancel your AT&T Wireless service is by calling customer support.

    Steps to Cancel by Phone:

    1. Dial 800-331-0500 from your mobile device or any phone.
    2. When prompted, choose your preferred language.
    3. Say “Cancel service” when asked about the reason for your call.
    4. Follow the automated prompts to connect with a customer service representative.
    5. Once connected, inform the representative that you wish to cancel your service. Be prepared to provide your account details for verification purposes.
    6. Discuss any outstanding balances, potential fees, or device returns.
    7. Confirm the cancellation and ask for a reference number or email confirmation for your records.

    Tips for Phone Cancellation:

    • Call during AT&T’s business hours to ensure quicker service.
    • Have your account information, such as your account number and PIN, ready to expedite the process.

    2. Canceling Online

    If you prefer a digital approach, you can cancel your AT&T Wireless service through their website using the chat feature.

    Steps to Cancel Online:

    1. Visit the official AT&T website (www.att.com).
    2. Log in to your account using your credentials.
    3. Navigate to the Support section.
    4. Open the Chat feature to connect with a customer service representative.
    5. Inform the representative that you wish to cancel your service. Provide any required account information for verification.
    6. Follow the representative’s instructions to complete the cancellation process.
    7. Request a confirmation email or reference number as proof of cancellation.

    Tips for Online Cancellation:

    • Ensure your internet connection is stable to avoid interruptions during the chat.
    • Take screenshots of the chat conversation for your records.

    3. Canceling In-Store

    For those who prefer face-to-face interactions, visiting an AT&T store can be an effective way to cancel your service.

    Steps to Cancel In-Store:

    1. Locate the nearest AT&T store using their website or mobile app.
    2. Visit the store during business hours.
    3. Speak with a store representative and inform them of your intention to cancel your service.
    4. Provide any required documentation, such as your account details and a valid ID.
    5. Discuss any outstanding balances, device returns, or fees.
    6. Complete the cancellation process and request a receipt or written confirmation.

    Tips for In-Store Cancellation:

    • Bring all necessary items, such as your device, charger, and account details.
    • Consider scheduling an appointment to minimize wait times.

    What to Do After Canceling Your AT&T Wireless Service?

    Once your cancellation is complete, there are a few additional steps to take:

    1. Check Your Final Bill: Monitor your email or AT&T account for your final bill. Ensure all charges are accurate and pay any remaining balances promptly.
    2. Return Equipment: If required, return any leased devices or equipment to avoid additional charges.
    3. Keep Records: Retain all cancellation confirmations, receipts, or chat transcripts for future reference.
    4. Port Your Number: If you’re switching carriers, make sure to port your number before canceling to avoid losing it.
    5. Monitor Your Credit: Ensure no unexpected charges are reported to credit bureaus, especially if you had an outstanding balance.

    Frequently Asked Questions (FAQs)

    Will I lose my phone number if I cancel my AT&T service?

    Not necessarily. If you’re switching to a new carrier, you can port your number before canceling your AT&T service. Contact your new carrier for assistance with the porting process.

    Can I cancel my AT&T service if I still owe money on my device?

    Yes, but you’ll need to pay off the remaining balance on your installment plan before completing the cancellation.

    How long does it take to process a cancellation?

    Cancellation processing times vary, but it’s usually effective within a few days. Check with the representative for specific timelines.

    What happens if I cancel during the cooling-off period?

    If you cancel within 14 days of activating your service, you may qualify for a full refund, provided you return your device in good condition.

    Canceling your AT&T Wireless service doesn’t have to be stressful. By understanding the process and preparing in advance, you can navigate the cancellation smoothly and efficiently. Whether you choose to cancel by phone, online, or in-store, ensure you’re aware of any fees, obligations, or final steps to complete the process successfully. Remember, staying informed is the key to making the transition as seamless as possible.

  • How to Cancel an eBay Bid As a Seller? A Comprehensive Guide!

    How to Cancel an eBay Bid As a Seller? A Comprehensive Guide!

    How to Cancel an eBay Bid As a Seller? Selling items on eBay can be a rewarding venture, allowing you to reach a vast audience and turn unwanted items into extra income. However, managing your listings and ensuring smooth transactions can sometimes present challenges, including situations where you may need to cancel a bid. While canceling bids should not be taken lightly, there are scenarios where it becomes necessary. This article will guide you through the proper steps and best practices for canceling bids on eBay, as well as provide insights into maintaining a positive reputation as a seller.

    How to Cancel an eBay Bid As a Seller

    Why Bid Management Matters?

    As an eBay seller, your credibility and reputation are paramount. Buyers rely on your integrity and the accuracy of your listings to make informed purchasing decisions. Cancelling bids, while sometimes unavoidable, can potentially affect your seller performance metrics and overall buyer satisfaction. Understanding the circumstances under which bid cancellations are acceptable and knowing how to execute them properly can help protect your standing as a seller.

    Before diving into the specifics of bid cancellation, let’s explore some general principles of effective bid management:

    1. Clear and Accurate Listings: Ensure your listings contain accurate descriptions, high-quality images, and correct details. This minimizes errors and reduces the likelihood of needing to cancel bids.
    2. Timely Communication: Maintain open communication with potential buyers. If an issue arises, addressing it promptly can often resolve concerns without the need for cancellations.
    3. Strategic Blocking: If you identify problematic bidders, blocking them from participating in your future auctions can help avoid complications.

    With these foundational principles in mind, let’s proceed to explore how to cancel bids effectively on eBay.

    How to Cancel Bids on eBay?

    There are specific scenarios where canceling a bid is allowed, such as errors in the listing, concerns about fraudulent buyers, or when a buyer requests cancellation. Follow these steps to manage bid cancellations:

    Step 1: Access the Bid Cancellation Tool

    To cancel a bid, you first need to access the appropriate tool on eBay. Here’s how:

    1. Navigate to the “Canceling bids placed on your listing” link. This is typically available through your eBay Seller Hub or by searching for the term directly on the eBay website.
    2. Click the link to open the Bid Cancellation Tool.

    Step 2: Provide Necessary Information

    Once you have accessed the tool, you’ll need to fill out the required details:

    1. Enter the Item Number: Each eBay listing has a unique identifier known as the item number. You can find this in your listing details or confirmation emails.
    2. Enter the Bidder’s Username: Specify the username of the bidder whose bid you intend to cancel. Be precise to avoid affecting other users.
    3. State the Reason for Cancellation: Provide a brief explanation for canceling the bid. Acceptable reasons include:
      • The item is no longer available for sale.
      • An error was made in the listing.
      • Suspicion of fraudulent activity from the bidder.
      • A request from the buyer to cancel their bid, which you agree to honor.

    Step 3: Submit Your Request

    After filling out the necessary details, click the “Submit” button to send your request to eBay. While eBay typically processes these requests promptly, it’s essential to remember the following:

    • Approval is not guaranteed: eBay may decline your request if it does not align with their policies or if the reason provided is deemed insufficient.
    • Frequent cancellations can impact your performance: Repeated cancellations may negatively affect your seller metrics and reputation.

    Important Notes to Consider

    When deciding whether to cancel a bid, keep the following in mind:

    1. Use Bid Cancellation Sparingly: Avoid canceling bids unless absolutely necessary. Doing so frequently can result in penalties or lower buyer trust.
    2. Provide Clear Reasons: A valid and transparent reason enhances your credibility and minimizes disputes.
    3. Monitor Feedback: Buyer feedback plays a significant role in your reputation. Poor feedback stemming from cancellations can affect future sales.

    Alternative Measures: Blocking Problematic Bidders

    If you encounter a bidder who consistently causes issues or you suspect is engaging in fraudulent behavior, consider blocking them from bidding on your future listings. To do this:

    1. Access your eBay Seller Hub settings.
    2. Navigate to the “Blocked Bidder/Buyer List” section.
    3. Add the user’s username to your blocked list.

    This proactive step helps prevent recurring issues and allows you to focus on legitimate buyers.

    Managing bids effectively is a critical aspect of being a successful seller on eBay. While bid cancellations are sometimes necessary, they should always be approached with caution and professionalism. By following the outlined steps and adhering to best practices, you can minimize disruptions, maintain your seller reputation, and provide a positive experience for buyers.

    Remember, your actions as a seller contribute to the overall trust and reliability of the eBay platform. By using bid cancellation tools responsibly and maintaining open communication with buyers, you can navigate challenges with confidence and continue to grow your eBay business effectively.

  • How to Cancel Apple TV Plus? A Comprehensive Guide!

    How to Cancel Apple TV Plus? A Comprehensive Guide!

    How to Cancel Apple TV Plus? Apple TV+ has become a popular choice for streaming entertainment, offering a wide array of original movies, TV shows, and documentaries. While the platform is known for its quality content, there may come a time when you decide to cancel your subscription. Whether you’ve found an alternative service, completed the shows you wanted to watch, or simply want to cut back on monthly expenses, knowing how to cancel your Apple TV+ subscription is essential. In this guide, we’ll explore the various ways you can cancel your subscription across different devices and provide important tips to ensure the process is seamless. Let’s dive in.

    How to Cancel Apple TV Plus

    Why People Cancel Their Apple TV+ Subscription?

    Before we delve into the cancellation process, it’s worth considering the reasons why people may choose to cancel their Apple TV+ subscription:

    1. Limited Use: Not everyone finds themselves using the service frequently enough to justify the cost.
    2. Budget Constraints: With the rise in subscription-based services, managing monthly expenses can become challenging.
    3. Content Preferences: While Apple TV+ offers critically acclaimed originals, some users may prefer platforms with a larger content library.
    4. Trial Period Completion: Many users sign up for Apple TV+ during a free trial and decide not to continue once the trial ends.
    5. Switching Services: New streaming platforms constantly emerge, tempting users to explore other options.

    Regardless of your reasons, canceling your Apple TV+ subscription is straightforward if you follow the correct steps. Below, we’ll outline how to cancel your subscription using different methods and devices.

    How to Cancel Your Apple TV+ Subscription?

    1. Canceling on the Web

    If you prefer managing your subscriptions via a web browser, you can easily cancel your Apple TV+ subscription online. Here’s how:

    1. Open your browser and go to account.apple.com.
    2. Sign in using your Apple ID and password.
    3. Navigate to the subscription section and follow the on-screen instructions to locate your Apple TV+ subscription.
    4. Select the subscription and click on the option to cancel it.

    This method is especially convenient if you’re using a device that doesn’t have the Apple TV app installed.

    2. Canceling on iPhone, iPad, or Apple Vision Pro

    For Apple device users, the process of canceling your subscription is integrated into the system settings. Follow these steps:

    1. Open the Settings app on your device.
    2. Tap your name at the top of the screen to access your Apple ID settings.
    3. Select Subscriptions from the list of options.
    4. Locate your Apple TV+ subscription and tap it.
    5. Scroll down, if necessary, and tap Cancel Subscription.

    You may be asked to confirm your choice. Once confirmed, your subscription will not renew at the end of the current billing cycle.

    3. Canceling on Mac

    Mac users can manage and cancel their Apple TV+ subscription through the App Store. Here’s how:

    1. Open the App Store app on your Mac.
    2. Click on your name in the bottom left corner. If you’re not signed in, click Sign In and enter your Apple ID credentials.
    3. Click Account Settings at the top right of the window.
    4. Scroll down to the Subscriptions section and click Manage.
    5. Find your Apple TV+ subscription, select it, and click Cancel Subscription.

    This method is quick and efficient, especially if you frequently use the App Store on your Mac.

    4. Canceling on Windows PC

    Windows PC users who access Apple TV+ via the Apple Music or Apple TV app can also cancel their subscription with ease. Follow these instructions:

    1. Open the Apple Music or Apple TV app on your Windows PC.
    2. Click your name at the bottom of the sidebar and select View My Account. You may need to sign in with your Apple ID.
    3. Scroll to the Settings section and locate Subscriptions.
    4. Click Manage next to Subscriptions.
    5. Select your Apple TV+ subscription and click Edit.
    6. Finally, click Cancel Subscription.

    This approach is ideal for users who primarily access Apple services on a Windows device.

    5. Canceling on Android Devices

    If you’re an Android user with an Apple TV+ subscription, you can cancel it through a web browser. Here’s how:

    1. Open your browser and go to account.apple.com.
    2. Sign in with your Apple ID.
    3. Navigate to the subscription management section and locate your Apple TV+ subscription.
    4. Follow the on-screen instructions to cancel your subscription.

    While Apple doesn’t offer a dedicated app for managing subscriptions on Android, the web option is a reliable alternative.

    Important Notes to Keep in Mind

    1. Cancel Before the Trial Ends: If you signed up for a free or discounted trial of Apple TV+, ensure that you cancel it at least 24 hours before the trial period ends. This prevents you from being charged for the next billing cycle.
    2. Regional Differences: The cancellation process might vary slightly depending on your country or region. Always check for region-specific instructions if you encounter difficulties.
    3. Third-Party Subscriptions: If you subscribed to Apple TV+ through a third party, such as Amazon, you’ll need to cancel the subscription through that platform. For example, if you pay for Apple TV+ via your Amazon account, you must manage and cancel your subscription through Amazon’s subscription settings.
    4. Access Until Billing Cycle Ends: After canceling, you will retain access to Apple TV+ until the end of your current billing cycle. This means you can continue to enjoy the content you love until your subscription officially expires.
    5. Refund Policy: Apple generally doesn’t offer refunds for canceled subscriptions. However, you can contact Apple Support to discuss exceptional cases or inquire about specific refund policies.

    Canceling your Apple TV+ subscription doesn’t have to be a daunting task. Whether you’re using an Apple device, a Windows PC, or an Android smartphone, there’s a cancellation method tailored to your needs. By following the steps outlined in this guide, you can confidently manage your subscription and make decisions that align with your preferences and budget.

    Remember, the flexibility to cancel and re-subscribe at any time ensures that Apple TV+ remains a convenient and user-friendly service. If you ever decide to return, Apple TV+ will be ready to welcome you back with its ever-growing library of quality content.

  • How to Cancel Apple Order? A Comprehensive Guide!

    How to Cancel Apple Order? A Comprehensive Guide!

    How to Cancel Apple Order? Apple is known for its seamless shopping experience, offering a wide range of products from iPhones to MacBooks and accessories. While the process of placing an order is straightforward, there are instances where you might need to cancel an order after it’s been placed. Whether it’s due to a change in preferences, an accidental order, or any other reason, knowing how to cancel an Apple order can save you time and hassle. This article will guide you step by step on how to cancel your Apple order, both online and through Apple Support, ensuring you can manage your purchases with ease.

    How to Cancel Apple Order

    Why You Might Need to Cancel an Apple Order?

    There are several reasons why someone might need to cancel an Apple order. Some of the most common scenarios include:

    1. Accidental Order Placement: Perhaps you clicked “Buy” a bit too quickly and realized afterward that it wasn’t the product you wanted.
    2. Change of Mind: After placing an order, you might decide you no longer need or want the product.
    3. Financial Considerations: Unforeseen expenses might lead you to reconsider your purchase.
    4. Product Availability Issues: If a newer model or a better deal becomes available, you might prefer to wait or switch to another product.
    5. Incorrect Order Details: Mistakes in shipping addresses, payment methods, or product configurations might necessitate canceling the order to correct them.

    Whatever your reason, Apple provides two main ways to cancel an order: online via the Apple Order Status page or by contacting Apple Support. Let’s dive into the specifics of each method.

    Canceling an Apple Order Online

    Canceling your Apple order online is the quickest and most straightforward method. Follow these steps to ensure your cancellation is successful:

    1. Visit the Apple Order Status Page
      • Go to the Apple Order Status page on your web browser.
      • This page is the central hub for managing your Apple orders, allowing you to track, modify, or cancel orders as needed.
    2. Sign In with Your Apple ID
      • Enter your Apple ID credentials to log in. Ensure you use the same Apple ID that was used to place the order.
      • If you’ve forgotten your Apple ID password, you can reset it using the “Forgot Password” option on the login page.
    3. Locate the Order You Want to Cancel
      • Once logged in, you’ll see a list of your recent orders. Browse through the list to find the specific order you wish to cancel.
      • If you have multiple orders, ensure you select the correct one by checking the order details, such as the product name, price, and order date.
    4. Select the Item You Want to Cancel
      • Click on the order to view its details. If the order contains multiple items, you can choose to cancel specific items or the entire order.
      • Ensure you review the cancellation policy for the product, as some items might be non-refundable or have specific terms and conditions.
    5. **Click “Cancel Item”
      • Once you’ve identified the item(s) you want to cancel, click the “Cancel Item” button.
      • Follow any on-screen prompts to confirm your cancellation. Apple will send you a confirmation email once the cancellation is processed.

    Important Notes:

    • Not all orders can be canceled online. For example, if your order has already been shipped, you’ll need to wait until it arrives and then initiate a return.
    • If the “Cancel Item” button is unavailable, it indicates that the order is no longer eligible for cancellation. In this case, contacting Apple Support is your best option.

    Canceling an Apple Order via Apple Support

    If you’re unable to cancel your order online or prefer direct assistance, contacting Apple Support is a reliable alternative. Here’s how to proceed:

    1. Visit the Apple Support Website
      • Navigate to the Apple Support website using your preferred web browser.
      • This platform offers a variety of resources and tools to help resolve any issues related to Apple products and services.
    2. Click “Contact Support”
      • On the Apple Support homepage, select the “Contact Support” option. This will direct you to a page where you can specify the issue you need assistance with.
    3. Select “Order Status” as the Issue
      • From the list of topics, choose “Order Status” to indicate that your inquiry relates to an existing order.
      • Apple may ask for additional details about your order, such as the order number or the email address associated with the purchase.
    4. Follow the On-Screen Instructions
      • Depending on your preference, you can choose to chat with a support representative or schedule a call with Apple Support.
      • Be prepared to provide the necessary details about your order to expedite the process.
    5. Confirm the Cancellation
      • Once connected to a support representative, explain your situation and request a cancellation.
      • The representative will guide you through the process and confirm whether your order is eligible for cancellation.

    Additional Tips:

    • Keep your order confirmation email handy, as it contains critical information that might be required during your support interaction.
    • If your order has already been shipped, Apple Support can assist you in arranging a return instead of a cancellation.

    Frequently Asked Questions

    1. Can I cancel my order after it has been shipped?

    • Once an order has been shipped, it cannot be canceled. However, you can initiate a return after the product is delivered by following Apple’s return policy.

    2. How long does it take to process a cancellation?

    • Cancellations are typically processed immediately. However, it might take a few business days for the refund to reflect in your account, depending on your payment method.

    3. Are there any cancellation fees?

    • Apple generally does not charge cancellation fees. However, it’s always a good idea to review the terms and conditions of your order.

    4. Can I modify my order instead of canceling it?

    • If your order hasn’t been processed yet, you might have the option to modify it. This can be done through the Apple Order Status page or by contacting Apple Support.

    5. What should I do if I can’t cancel my order online?

    • If the online cancellation option is unavailable, contacting Apple Support is the next best step. Their team can assist you with cancellations or alternative solutions.

    Canceling an Apple order is a straightforward process, whether you choose to do it online or through Apple Support. By following the steps outlined in this guide, you can manage your purchases with confidence and ensure a smooth experience. Remember to act promptly if you need to cancel an order, as the eligibility for cancellation might depend on the order status. With Apple’s customer-focused approach, you can rest assured that assistance is readily available whenever you need it.

  • How to Cancel App Subscriptions On Iphone? A Comprehensive Guide!

    How to Cancel App Subscriptions On Iphone? A Comprehensive Guide!

    How to Cancel App Subscriptions On Iphone? Managing subscriptions on your iPhone has never been more crucial, given how many services we rely on in our daily lives. From streaming platforms to productivity tools, these subscriptions often run quietly in the background, silently renewing while many of us may not even notice. Staying on top of your subscriptions isn’t just about saving money; it’s also about maintaining control over what you’re paying for and ensuring that each service you’re subscribed to is something you truly need or value.

    How to Cancel App Subscriptions On Iphone

    Imagine a scenario where you’ve signed up for a free trial, intending to cancel it before the billing begins, but then forget. Or perhaps, over time, you’ve accumulated multiple app subscriptions, some of which you haven’t used in months. These small charges can add up to significant expenses over time. This makes it vital to know how to review and, if needed, cancel subscriptions efficiently right from your iPhone.

    The good news is that Apple has made it relatively straightforward to manage subscriptions. Whether you’re looking to prevent a renewal, stop a free trial from turning into a paid plan, or simply cut back on unnecessary expenses, your iPhone provides you with all the tools you need. In this article, we will guide you step-by-step on how to cancel app subscriptions on your iPhone, while also touching on essential considerations you should keep in mind.

    Here’s how to cancel app subscriptions on your iPhone:

    1. Open Settings: Locate and tap the “Settings” app on your iPhone’s home screen.
    2. Access Your Apple ID: Tap your name or Apple ID at the top of the Settings menu.
    3. Go to Subscriptions: Scroll down and tap “Subscriptions.”
    4. Select the Subscription: Find the subscription you wish to cancel in the list of “Active” subscriptions.
    5. Cancel the Subscription: Tap “Cancel Subscription.” You may be asked to confirm the cancellation.That’s it! Your subscription will be canceled.

    Important Notes:

    • Timing: Cancellations may take effect immediately or at the end of the current billing cycle, depending on the app.
    • Free Trials: If you’re in a free trial, cancel before the trial ends to avoid being charged.
    • Family Sharing: If you’re using Family Sharing, canceling a subscription will affect all family members.

    Alternative Method (via App Store):

    1. Open the App Store app.
    2. Tap your profile icon in the top right corner.
    3. Tap “Subscriptions.”
    4. Follow the same steps as above to select and cancel the subscription.

    Managing your subscriptions doesn’t have to be overwhelming, especially when you’re equipped with the knowledge and tools to handle it directly from your device. Whether you’re tightening your budget, streamlining your app usage, or simply want to be more intentional with your spending, regularly reviewing your subscriptions is a step in the right direction.

  • How to Cancel an Email In Gmail? A Comprehensive Guide!

    How to Cancel an Email In Gmail? A Comprehensive Guide!

    How to Cancel an Email In Gmail? Have you ever hit “send” on an email, only to immediately wish you could take it back? Maybe you spotted a typo, forgot to attach an important file, or sent the message to the wrong recipient. Whatever the reason, Gmail offers a lifesaving feature called “Undo Send” that can help you cancel a sent email before it reaches the recipient. This guide will walk you through how to use the “Undo Send” feature effectively and ensure your email communication remains stress-free.

    How to Cancel an Email In Gmail

    What Is the “Undo Send” Feature in Gmail?

    The “Undo Send” feature in Gmail acts as a safety net, giving you a short window of time to cancel an email after you’ve sent it. This feature doesn’t recall the email from the recipient’s inbox but instead delays the actual sending process, allowing you to retract the message before it’s officially delivered.

    Whether you’re using Gmail for personal or professional communication, knowing how to enable and use “Undo Send” can save you from potential embarrassment and help you maintain a polished, professional image.

    How to Enable the “Undo Send” Feature in Gmail?

    Before you can cancel an email in Gmail, you need to enable the “Undo Send” feature. Follow these simple steps to get started:

    1. Open Gmail Settings

    1. Log in to your Gmail account on your computer.
    2. Click on the Settings gear icon located in the top-right corner of the screen.
    3. From the dropdown menu, select See all settings to access the full settings menu.

    2. Enable “Undo Send”

    1. Under the General tab in the settings menu, scroll down until you find the Undo Send section.
    2. Check the box to enable the “Undo Send” feature.
    3. Use the dropdown menu to select a cancellation period. You can choose from 5, 10, 20, or 30 seconds. This determines how long you’ll have to cancel a sent email.
    4. Scroll to the bottom of the page and click Save Changes to apply your settings.

    Congratulations! You’ve successfully enabled the “Undo Send” feature in Gmail. Now, let’s explore how to use it.

    How to Cancel a Sent Email in Gmail?

    Once you’ve enabled the “Undo Send” feature, canceling a sent email is a breeze. Here’s how it works:

    1. Send an Email

    Compose your email as usual and click the Send button when you’re ready to send it.

    2. Look for the Notification

    After sending the email, a small notification will appear in the bottom-left corner of the Gmail interface. It will say “Message sent” and include an Undo link.

    3. Click “Undo”

    If you want to cancel the email, click the Undo link within the cancellation period you selected earlier (5, 10, 20, or 30 seconds).

    Once you click “Undo,” the email will be unsent, and you’ll be redirected back to the email draft. You can make any necessary edits or delete the draft entirely.

    Important Notes About the “Undo Send” Feature

    While the “Undo Send” feature is incredibly useful, there are a few important limitations to keep in mind:

    1. Time Limit

    The “Undo Send” feature only works within the cancellation period you selected in the settings. Once this time window expires, the email will be delivered to the recipient, and you won’t be able to recall it.

    2. No Guarantee

    Even though the “Undo Send” feature delays the sending process, there’s no absolute guarantee that the recipient won’t see the email if the cancellation isn’t completed in time. Always double-check your emails before hitting “send” to minimize errors.

    Why the “Undo Send” Feature Matters?

    In today’s fast-paced digital world, mistakes happen. You might:

    • Misspell the recipient’s name or email address.
    • Forget to include important details or attachments.
    • Accidentally send a confidential email to the wrong person.
    • Realize too late that your tone or message content wasn’t appropriate.

    The “Undo Send” feature gives you a valuable second chance to correct these errors, ensuring your emails are accurate, professional, and effective.

    Tips for Effective Email Communication

    While the “Undo Send” feature is a helpful tool, it’s always best to prevent mistakes in the first place. Here are some tips to improve your email communication skills:

    1. Proofread Before Sending: Take a moment to review your email for spelling, grammar, and formatting errors before hitting “send.”
    2. Double-Check Attachments: If you’re including an attachment, make sure it’s the correct file and that it’s actually attached.
    3. Use a Clear Subject Line: A concise and relevant subject line helps the recipient understand the purpose of your email at a glance.
    4. Keep It Professional: Use a polite and professional tone, especially in work-related emails.
    5. Verify Recipients: Double-check the recipient’s email address to ensure you’re sending the message to the right person.
    6. Take Advantage of Drafts: If you’re unsure about your email, save it as a draft and review it later before sending.
    7. Use Tools for Clarity: Consider using tools like Grammarly to catch errors and improve the clarity of your writing.

    The “Undo Send” feature in Gmail is a simple yet powerful tool that can save you from the consequences of email mistakes. By enabling this feature and using it effectively, you can enjoy greater peace of mind and maintain a professional image in your communications.

    However, remember that prevention is better than cure. Always take the time to review your emails before sending them to minimize the need for retraction. With careful preparation and the help of “Undo Send,” you can take control of your email communication and avoid unnecessary stress.